Update Procedure
Automatic
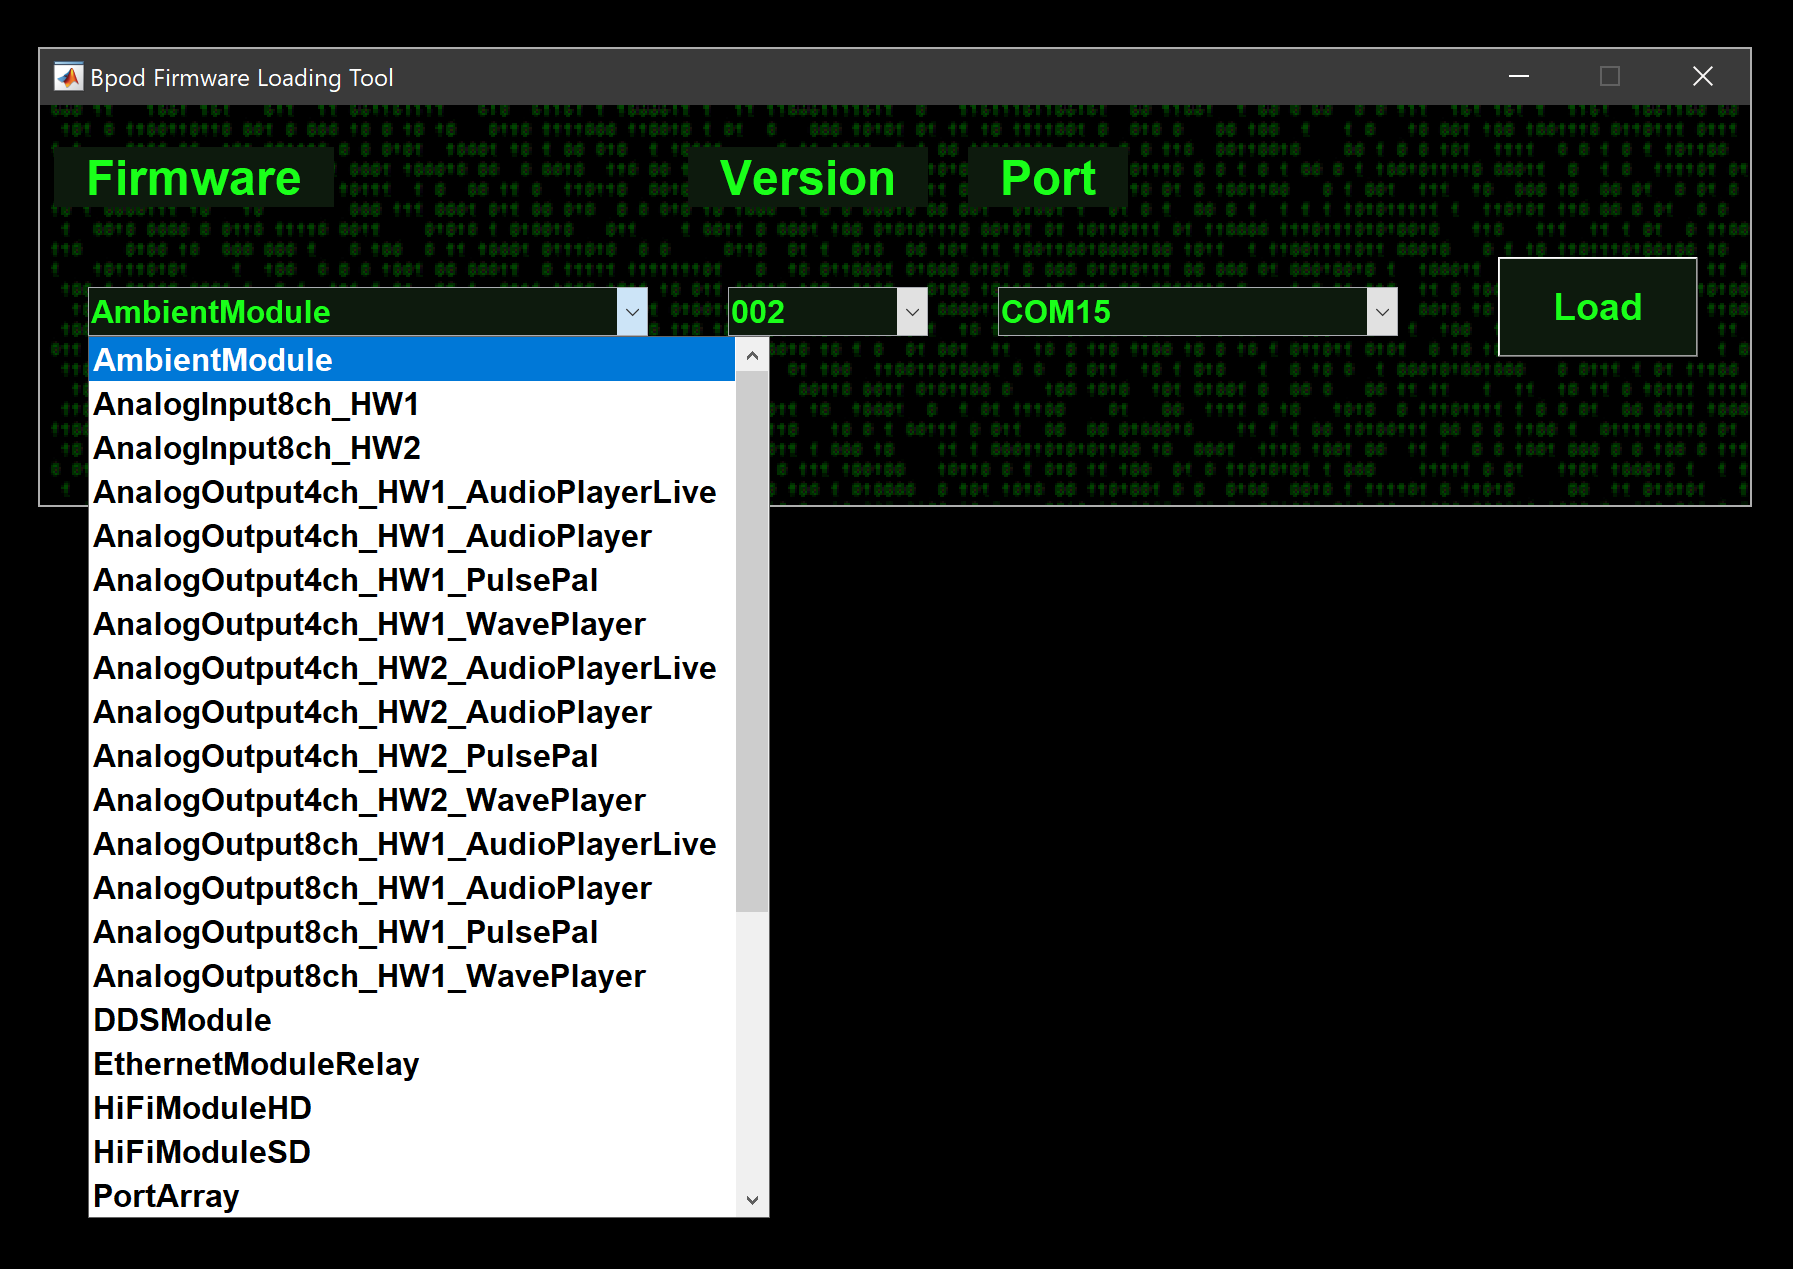
From the MATLAB-command prompt, run: LoadBpodFirmware;
A GUI will launch. Select the correct firmware file, version and the target device's COM port, and click 'Load'.
- Firmware file names follow the convention: ModuleName_HardwareVersion_FirmwareType
- The latest firmware version is selected by default.
Manual
-
Download the Arduino 2.2.X zip file, extract the zip folder and save the extracted folder somewhere permanent on your PC.
-
Download the firmware file to update from this list. Firmware is an Arduino sketch.
-
Plug the Bpod device into the governing computer's USB port.
-
Open the Arduino program folder and run Arduino.exe.
-
Install support for the target Arduino board (if you haven't done this already):
- From the left sidebar, open the "Boards Manager".
- Select "Teensy" for:
- State Machine r2, r2.5, r2+
- Analog Output Module
- Analog Input Module
- Rotary Encoder Module
- HiFi Module
- Ethernet Module
- Valve Driver Module v2
- DDS Module
- Port Array Module
- Select "Arduino SAM boards (32-bits ARM Cortex M3)" for:
- State Machine r0.5 - r1.0
- Select "Sparkfun SAMD (32-bits ARM Cortex M0+)" for:
- I2C Module
- SNES Module
- Valve Driver Module v1
- Select "Adafruit SAMD (32-bits ARM Cortex M0+)" for:
- Ambient Module
-
From the "Tools" menu, choose the target Arduino board:
- Select "Teensy > Teensy4.1" for:
- State Machine r2.5, r2+
- HiFi Module
- Analog Output Module v2
- Analog Input Module v2
- Select "Teensy > Teensy4.0" for:
- Rotary Encoder Module v2
- Valve Driver Module v2
- Select "Teensy > Teensy 3.6" for:
- State Machine r2
- Analog Output Module v1
- Analog Input Module v1
- Select "Teensy > Teensy 3.5" for:
- Rotary Encoder Module v1
- Bpod Stepper Module v1
- Select "Teensy > Teensy 3.2" for:
- Port Array Module
- Ethernet Module
- Select "Sparkfun SAMD > Sparkfun SAMD21 Mini" for:
- Valve Driver Module v1
- I2C Module
- SNES Module
- Select "Adafruit SAMD > Adafruit Trinket M0" for:
- Ambient Module
- Select "Teensy > Teensy4.1" for:
-
From the "Serial Port" menu, choose "COMX" (win) or "/dev/ttySX" (linux) where X is the port number. To find your port number in Windows, choose "Start" and type "device manager" in the search window. In the device manager, scroll down to "Ports (COM & LPT)" and expand the menu. The correct COM port will disappear from the list when the device is unplugged.
-
From the File menu in Arduino, choose "Open" and select the firmware.
- Firmware with preconfigured macros for each model is in /Preconfigured/vXX/ where XX is the latest state machine firmware version.
- A new window should open with the firmware.
-
In the new window, click the "upload" button (the right-pointing arrow roughly under the "edit" menu).
If all went well, the progress indicator should finish, and be replaced with a message: "Done uploading". In the Output window below, a message should read "Verify successful".